Preparing ACS Data from the US Census Bureau for a Table Join
This tutorial demonstrates cleaning and preparing a table from the US Census Bureau’s American Community Survey for joining within GIS software, using Microsoft Excel.
Included in this tutorial:
Cleaning the ACS data table
Cleaning the Headers and Columns
Removing special characters
Performing Calculations
Example 1: Adding values across fields
Example 2: Extracting characters from a string
Saving the table
Software version in examples: MS Excel 2019 (version 2015)
Tutorial Data: The tutorial demonstrates with the table downloaded in the Downloading Census Tables tutorial.
US Census Bureau. “Table S1501: Educational Attainment by census tract, Queens county, New York” (dataset). 2013 American Community Survey, 5-Year Estimates. Accessed via data.census.gov, 25 June 2021.
Credits: Moses Levich and Thiago Lee (2021). Updated by L. Meisterlin (2025)
Note on spreadsheet software: If you do not have access to Excel or prefer a different software, the principles and steps demonstrated in this tutorial can be applied with any table data-management software.
Suggestions for working with ACS data:
Save a copy of the original table before making any changes or edits.
Open the included metadata file for details on each column.
Cleaning the ACS data table
Open the data table CSV file downloaded from the US Census Bureau in Microsoft Excel (or your software of choice).
Cleaning up Headers and Columns
GIS tables have a single header row. If your table has a double header row, delete one of the rows. In this example, the second header row is deleted.
deleting the second header row
To simplify large tables, delete unnecessary columns, if applicable. For this example, all columns have been deleted except
GEO_ID,
NAME,
S1501_C01_007E (Pop. over 25, less than 9th grade), and
S1501_C01_008E (Pop. over 25, 9th-12th grade no diploma)
Select a column by clicking on its letter-label in Excel’s header row. Select multiple columns using shift + click or ctrl + click. Delete selected columns with right-click > Delete.
deleting columns, using shift+click and ctrl+click to select multiple columns
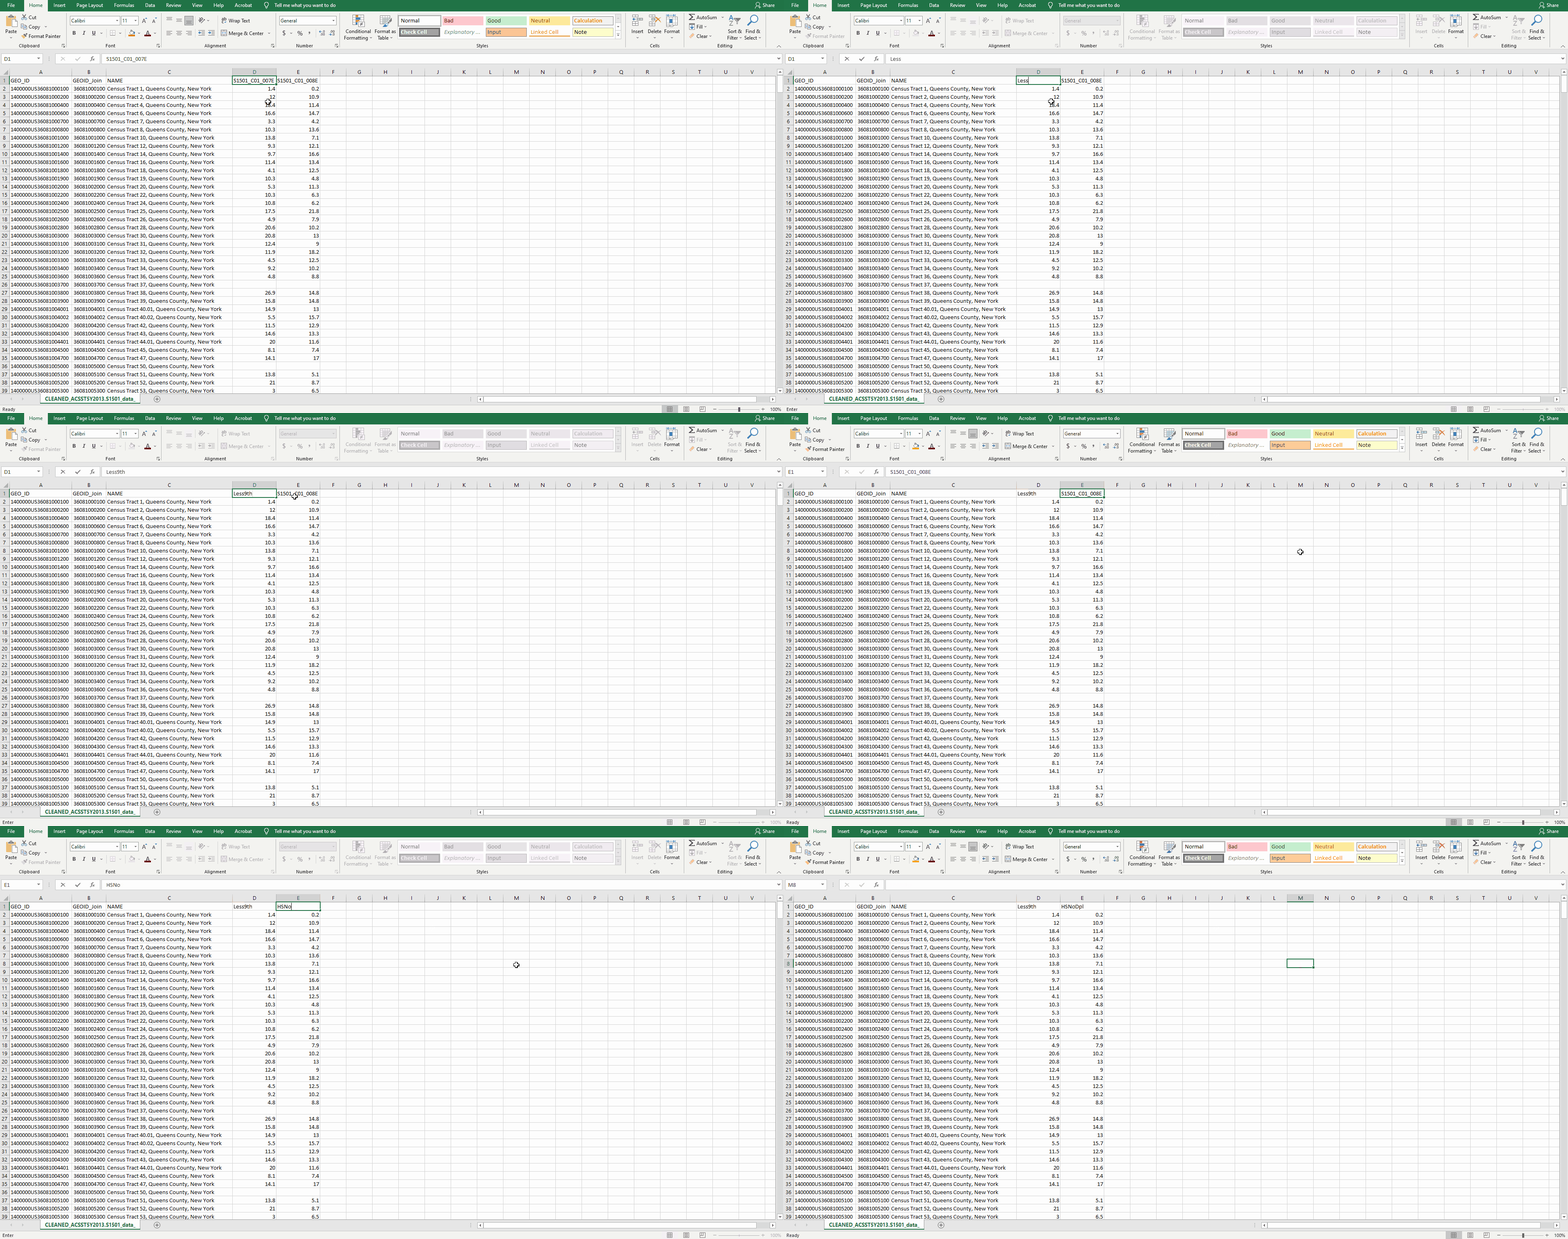
To easily identify important columns later, rename each one to something more recognizable. In this example, S1501_C01_007E is renamed to Less9th, and S1501_C01_008E is renamed to HSNoDpl.
renaming columns
There are a handful of constraints to consider when naming fields for use within a GIS:
Field header names cannot begin with numbers or underscores.
Field headers cannot contain special characters, including spaces, hyphens, brackets, etc (with the exception of underscores).
If working with shapefiles, field names must be 10 characters or fewer.
Removing Special Characters
Special characters, such as asterisks and hyphens, within table cells cause problems later (such as constituting a text/string field rather than numeric).
To remove special characters from cells in Excel, use ctrl + f to bring up the Find and Replace dialogue, then click the Replace tab. In this example, hyphens representing null values are replaced with empty cells. This is done by leaving the “Replace with” field blank.
TIP: The asterisk is a special character in Excel. In order for Excel to properly recognize asterisks in the Find and Replace dialogue, type a tilde (~) before the asterisks.
removing special characters from a table with the Find and Replace dialogue
Performing calculations in Excel
To save time, it is often easier to calculate values in Excel (or your preferred software) rather than in GIS software.
Example 1: Adding values across fields
For this example, in a new column named NoHSDpl, the Less9th and HSNoDpl columns are summed to find the total population over 25 without a high school diploma.
First, name a new column with a header in the first row.
naming a new column
Next, enter the first cell below the header and type the “=” sign, followed by the appropriate expression. In this example, since values in columns C and D are being added, the equation is “(C2+D2)”.
Double-click the lower-right corner of the cell to apply the equation to the entire column.
entering an equation and applying it to an entire column
Example 2: Extracting characters from a string
Additional calculations may be necessary to ensure that the common field shared by the join table and target GIS layer are of the same length and format. In this example, the GEOID_Join column was calculated from the GEO_ID column to match the format of the corresponding join field in a GIS layer.
In this example, the right function is used to extract characters from a value or text counting from the rightmost side. The formula is =Right(text, [num_chars]).
In its first argument, type text or reference a cell from which you want to extract characters.
In the second argument, after the comma, specify the number of characters to be extracted.
Double-click on the lower-right corner of the cell to apply the equation to the entire column.
creating a join column using the Right function
Confirm in the GIS software that the column in the CSV file and its corresponding field in the target GIS layer have the same data type. If not, you will have to match both to perform a table join.
Saving the table
To save a table as a .csv (comma-separated value) file, click through File > Save As, and choose a location and name for your file. In the dropdown menu next to Save as type choose CSV.
saving the file as a CSV
Most GIS software can also read .xls, .xlsx, and .txt formats. For an Excel file with multiple sheets, GIS software will treat each sheet as a separate table.
